Tuesday, October 28, 2014
Character Rigging 1
This Month we were to Rig a Rabbit character, In order to properly rig the Rabbit character we had to learn where the best places to lay joints, ask that when we get the geometry to follow the joint system that it deform in a way that would be functional and still look great. We created a Proxy Rig which is a faster but still a great way to rig, as it still accomplishes the purpose of bringing a character to life, and could be sent to the animator while the Rigger finishes up on the bound rig.
We created an IK system for the legs which I think is great, as it makes the animators job of having grounded a lot easier than an FK systems. For the feet I created and rfl system which basically allows you to accomplish a Foot Roll which is essential for walking animation; we also included banking, which makes your feet able to move in a more versatile manner.
Whats very important is that we created an FK/IK switch for the arms, which is extremely important as it gives the animator more control over the arm movements, and allows him to tackle different animations in different ways. The FK system allows you to control the individual Control Icons, and gives you more precision in animation(but may take longer to animate); While the IK system gives you a faster way to animate, and has pole vectors for controlling the elbows (pretty great for less complex arm motions).
Also whats pretty awesome is that this month we created a Stretchy Back system for the Rabbit. Which can help really bring out the cartoon qualities of a rig, you can make S or C shapes with the back by moving the control icons on the inner part of the normal spine controls. What I really love about the Stretchy Back system is that its perfect for squash and stretch, and allows you to go well past what you thought the limit for the Rig was.
Now I'll post a couple of Poses I made with the Rabbit Rig I created:
The first picture is a view of the Rig layout, like where the controls are on the Rabbit will give you some hints as to how it controls.
The rest of the pictures are more focused on the poses themselves and What type of movements the rig is capable of. I think it can pull off some really great stuff, and is great enough that the Animator should feel confident in what he can accomplish with this rig.
Pretty happy with the what I created in the Rabbit rig, and I'm glad to see all the different types of movements he can make. Although I am retaking this class I needed a refresher in Rigging anyway, and Im pretty happy with the outcome. We also learned how to write script for Python (which is used in a lot more programs than Mel which is Maya's personal code and only Maya's. It allows you to create Tools that you can use in the future to help make your job a little easier (its just very convenient).
Monday, September 29, 2014
Visual Development
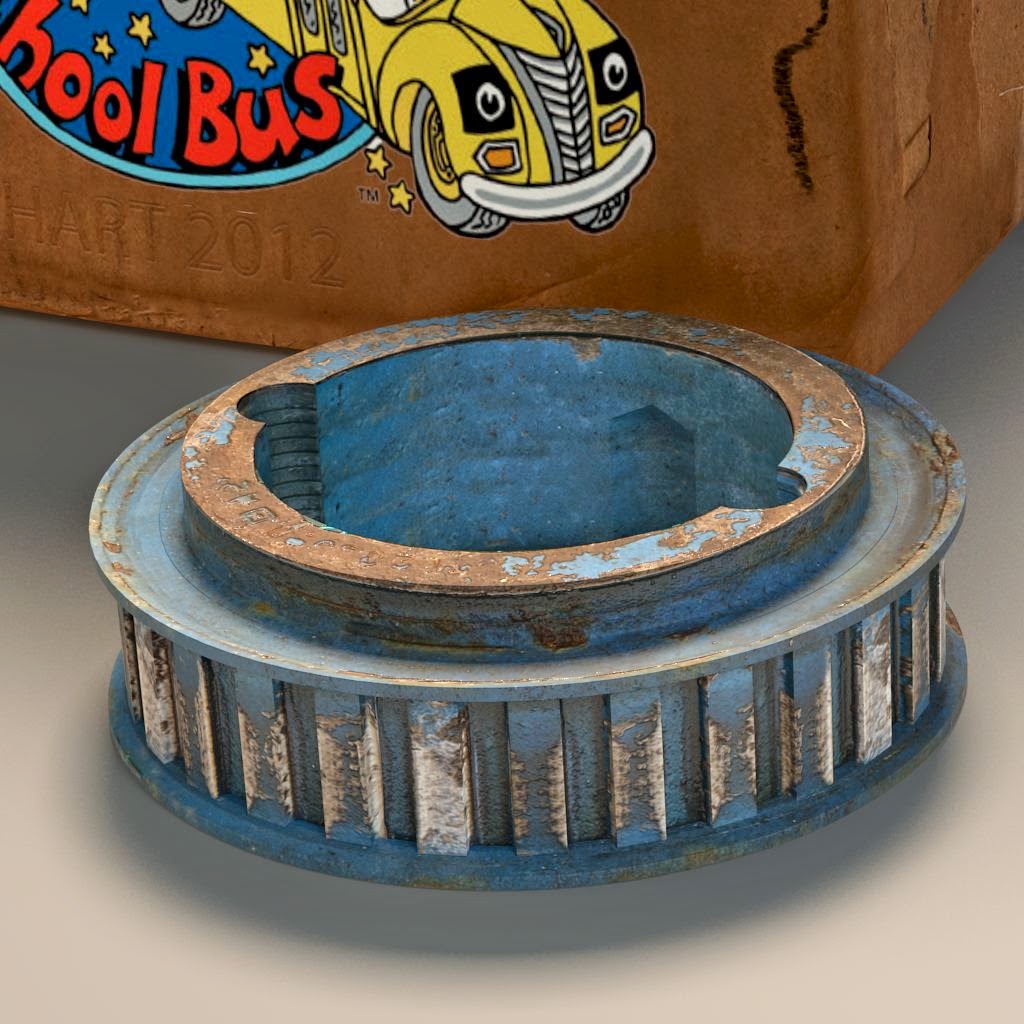
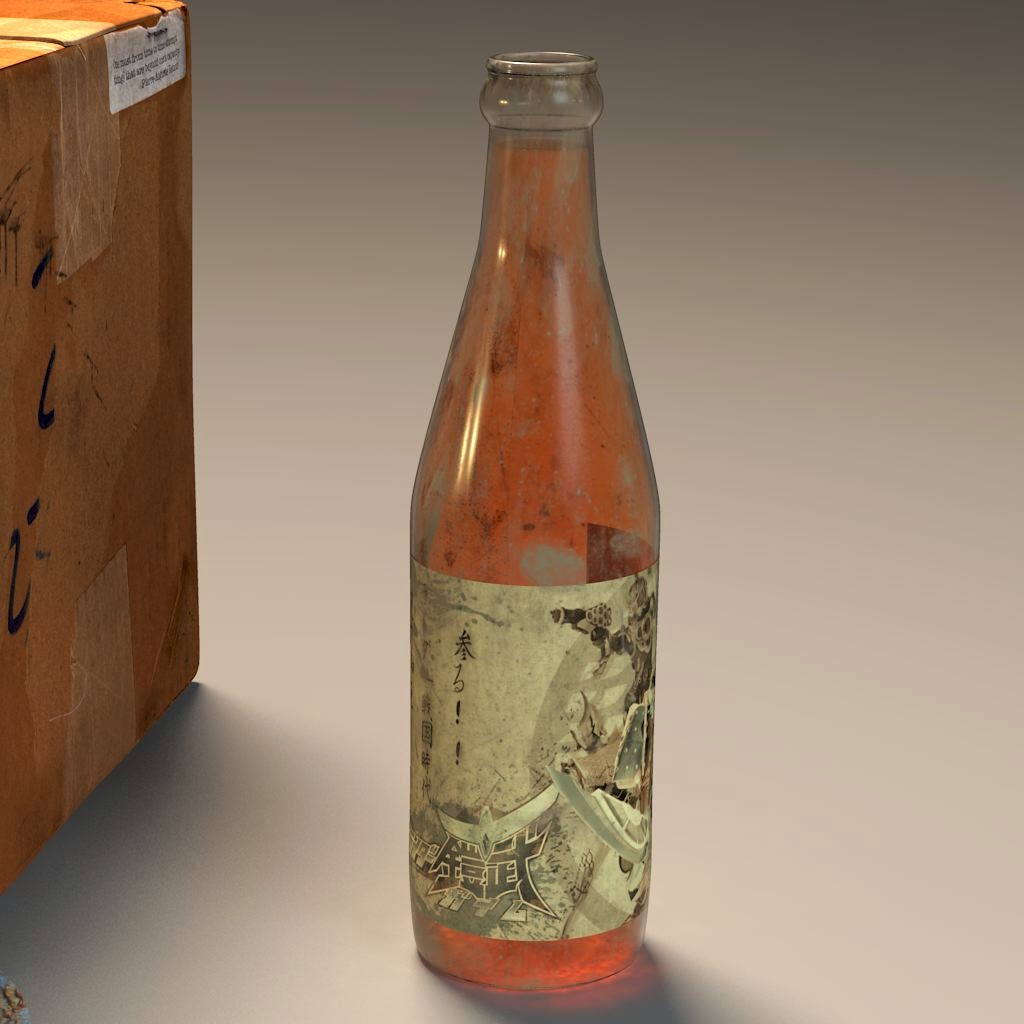
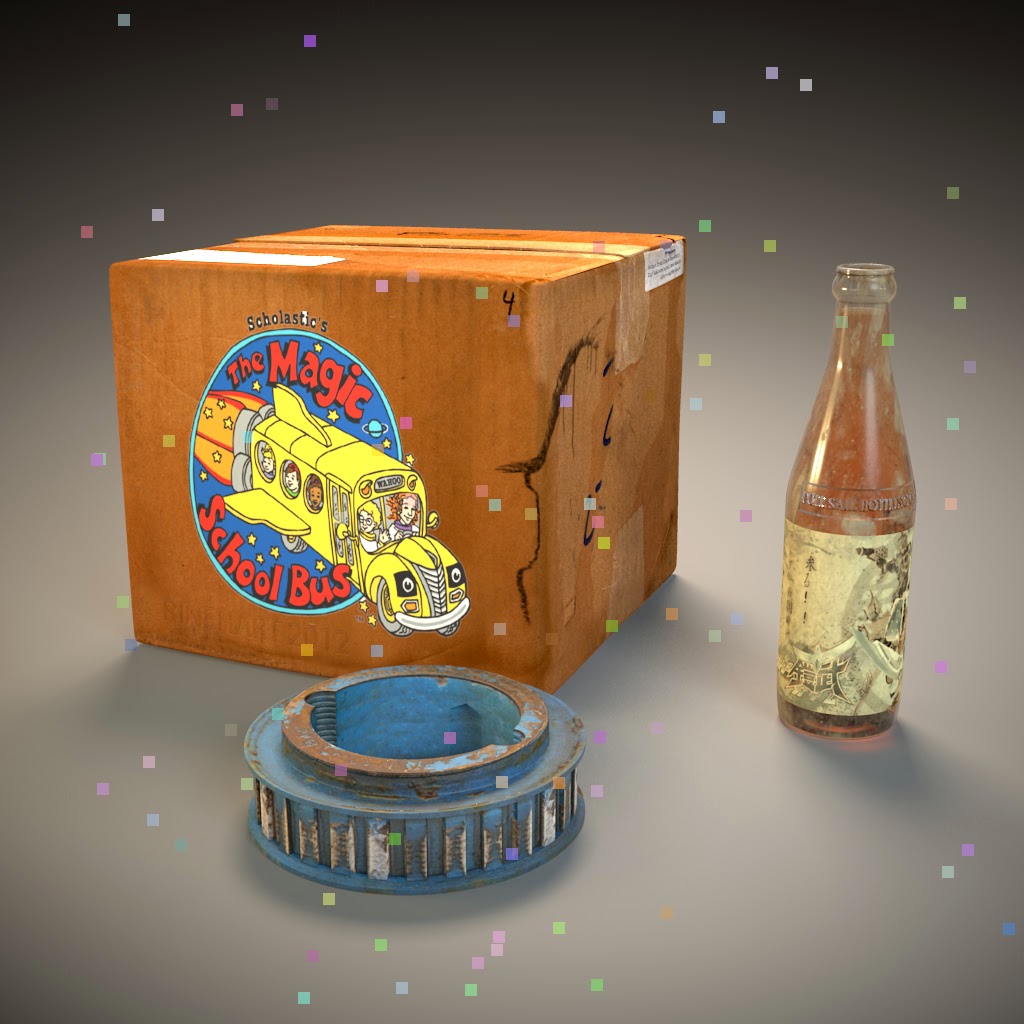
My final for Visual Development (VSD) is a scene made up of a cardboard box, a gear, and a full soda bottle. This scene was actually pretty complex in Shading and Lighting, well in my opinion as a student.
for the box I had to apply a mia material x passes to it, and on the color (sliders) texture box applied the cardboard texture to it. I also input the cardboard bump into the overall bump. But the tougher parts of the box were definitely applying projections through the Layered Texture. I applied a Magic School Bus projection and connected it to through the layered texture, and set the Blend to over as to get more of a feel of a sticker. I also made an alpha of the sticker so that sticker would lay on properly and applied it to the Magic School Bus layer's alpha (inside the Layered Texture node). I had to connect the actual Magic School Bus texture and the alpha together through the alpha's so that there location would be in the same place. I also put the alpha into the mia material x passes' reflection as to get a shine of a sticker. I did most of the steps for the dirt on the side of the box as well, besides the reflection. I did set the dirt to multiply in the layered texture node rather than over though.
The gear was important as it was the only one of the 3 that I UV'ed myself. I selected edges and cut seams around less noticeable areas of the gear, and Planar/Cylindrical map them into the UV editor. I arranged the pieces of the UV's into a more organized layout in the 0 to 1 space, trying to maximize space in the UV editor. Then I brought those UV's into photoshop through the UV snapshot inside the UV editor. Given the texture of the gear that we were given in the Source Images folder of the project. I used somewhat limited information but enough, to make a nice Diffuse texture that would like nice on the gear UV layout. and then I made a bump map of the Diffuse through Black and White Hue adjustment in photoshop. I applied the mia material x passes material to the gear, and turned down the glossiness. The texture and bump were set into their inputs. I made 2 ramps [(white to black, and black to white) top to bottom] and connected them together through the connection editor. Then I put them into the reflectivity of the gear as to get more control and separation between the gear's paint and the rust.
So the bottle was probably the most elaborate of the 3 pieces. first I applied a mia material x passes to the bottle. Then went to the Cool lights shadows and set the ray depth limit to 10, and in the render settings I set my Raytracing settings to 10, 10, 20, 10. This alone should help me get a decent looking bottle. I turned max distance on, and set it to 15 so that the reflection of the box won't darken the bottle. Under BRDF I turned on Fresnel Refraction, and I got it looking a lot nicer. After I got the reflections I wanted, I moved on to the label of the bottle. I selected the bottles geometry and in mia material x passes, I connected a layered texture node and applied an image to the color of the layered textures first box. I then used the UV 2d texture movement node, and changed the size and placement of the label. Through the hyper shade I connected the fingerprint dust/paint to the layered texture, and combined it with an alpha for the label on the bottle. I had to connect the original label file to a separate layered texture node to control the individual areas of color, It also made the fingerprints a lot more noticeable and gave me more control for the color and opacity of the fingerprints.
Then I moved on to the liquid of the soda bottle, and I once again applied a mia material x passes. I turned up the roughness and reflectivity to 1.0, and I set the Index of refraction to 1.1 to get a better look for liquid. I then turned the transparency up to 1.0 so that It could look and feel much more like a liquid. Whats really important though was the advanced refraction and I checked on the Use Max Distance and I set that to 5. I also checked on Use Color at max distance so that I could change and manipulate the color of the fluid and the dropoff rate of the liquid so that its not one solid color. Its was also really important to turn on Use Transluncency under the Transluncency tab. I changed the color to the same orange in the Color at max distance, and turned the weight down to 0.3 that seemed to make the orange more rich. Also, I couldn't forget to turn the skip reflections on the inside off. I went back and changed Transparent Shadow to Refractive Caustic on both the bottle and the liquid so that the caustics would show through the render view. But before that I turned on the Caustics under the features tab, and I adjusted the Caustics Accuracy. I finished up by putting a bump on the bottle.
For my Final Render in Nuke, I created Render Layers and rendered out different area lights, and a point light. In the title of key light, warm light, and cool light. I rendered them out in an EXR file, and brought them into Nuke, did some slight adjusting in Nuke, and tried a bit more but ran into a lot of problems that made me have to recover my work. Brought together through switches and merge (plus) nodes, it looks a lot like the beauty pass that I rendered out. Whats really cool is that working in Nuke helped me realize the level of control I could have after I finished working on the actual project.
Sunday, August 31, 2014
Visual Effects 2
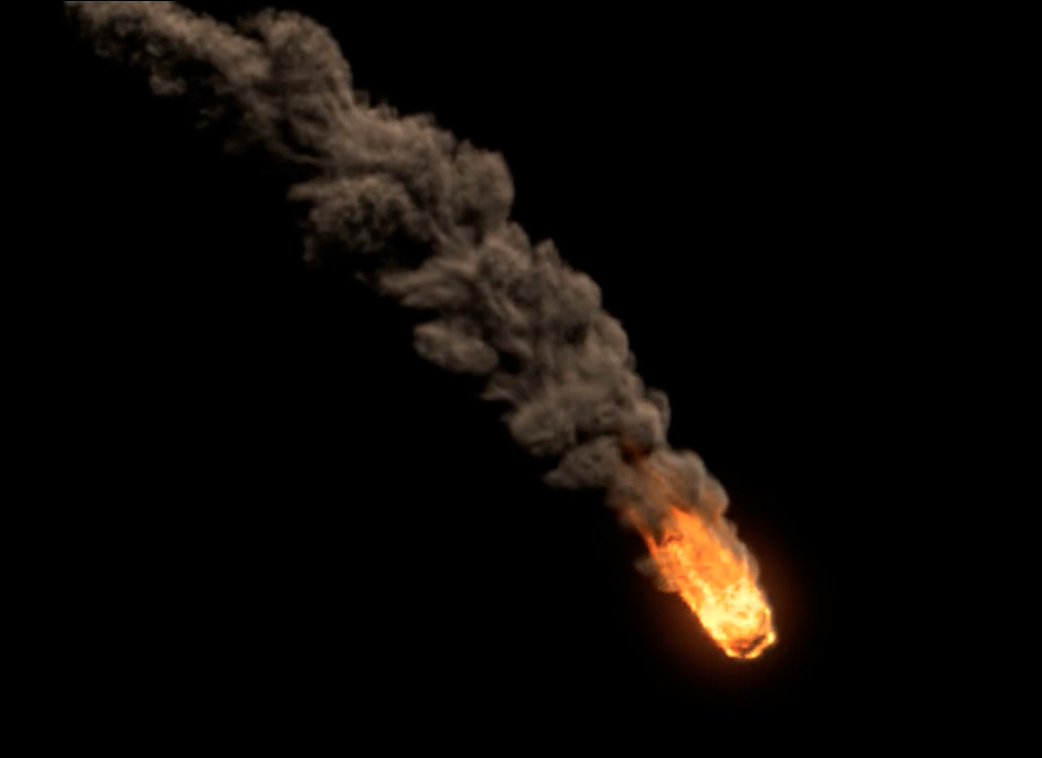
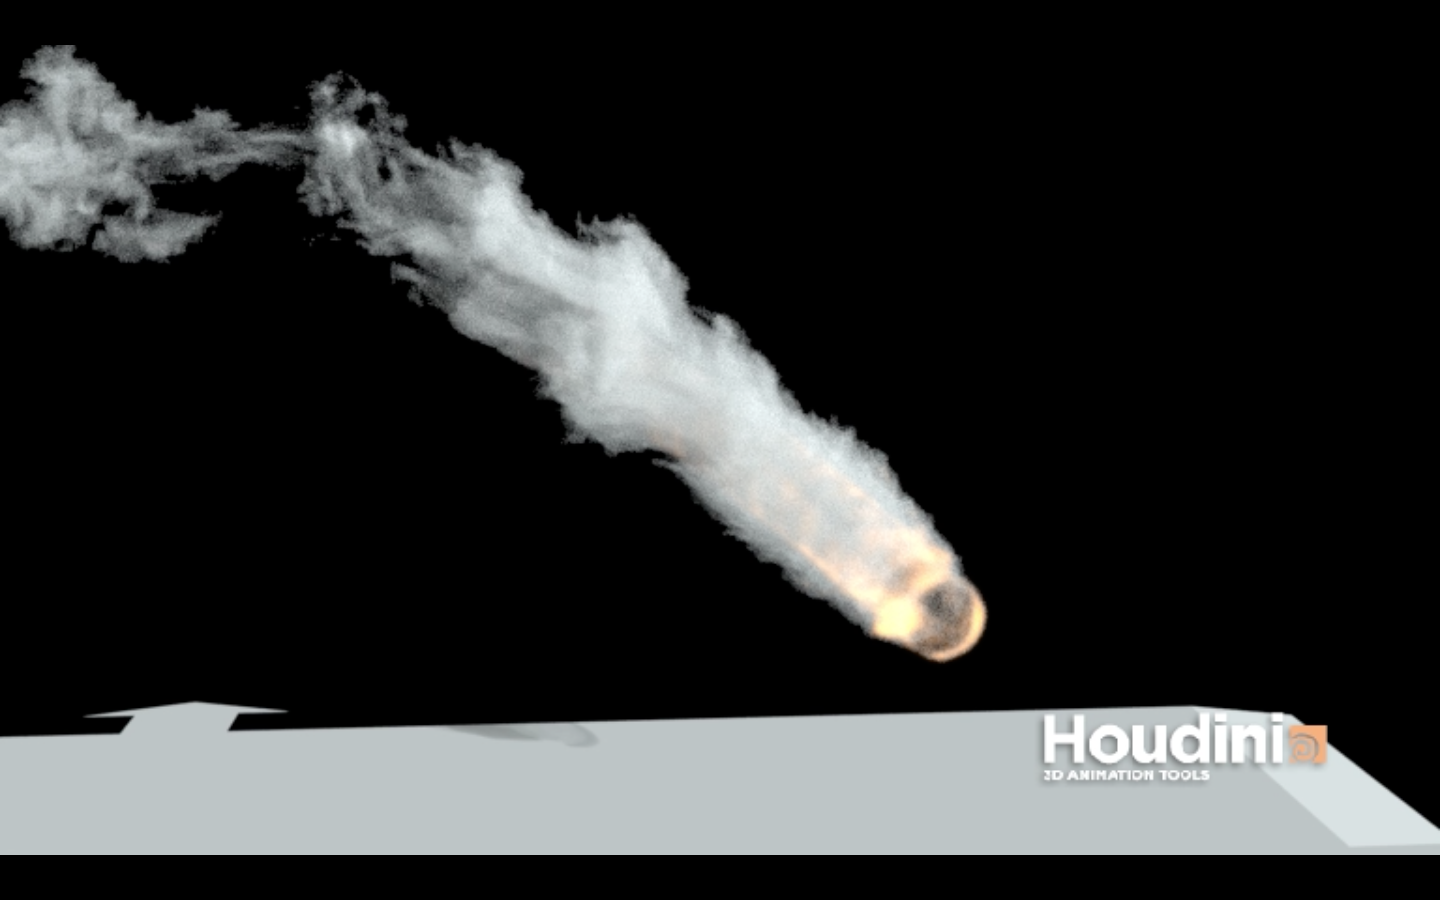
This is my Final for VEF2, I decided to create a Meteor creating through the sky. Finding references I found a video of a real meteor crashing through the sky and it was gorgeous, It looked nothing like the movies; But I thought the effect would be even more difficult and I wasn't sure if people would noticeably know it was a meteor. I found a meteor effect made on Houdini and I thought it would be cool to make something like that.
I decided to use Houdini as my reference was created in Houdini, but I mostly wanted to learn more about Houdini fluids, and Houdini in general.
I looked for tutorials to help me on my way with the meteor, but I didn't find too many Houdini tutorials. That was a little off-putting because there were a lot of examples of Houdini meteors but not too much on how they made it. I managed though with a lot of experimenting.
I used knowledge that I learned from both Software Technology and Visual Effects 2 in order to create a nice looking meteor effect.
I created a fluid container and then I made the meteor a RBD object. I then pretty much adjusted the settings and nodes in Houdini. I really adjusted the Pyro node, Pyro Solver, and the Resize Fluid Container (several of the tabs inside of those).
I ran into trouble with getting the fire to look less like its leaving a motion trail, luckily the thicker smoke makes it less noticeable. I had some trouble making the smoke thicker in the render view as well; I made huge changes in the pyro node's density ramp and it helped me to get a thicker smoke.
Probably the most trouble I had in Houdini, was getting the way the smoke was lighted and shaded to appear in the Mantra Render. I got some subtle changes in the renderer, but it came with some extreme changes in the viewport. Also I may have needed to do some work in Nuke to replace the transparent meteor with one with a texture. I adjusted the bounding box, but I guess I didn't adjust it enough.
This is what my Final result looks like, and Im proud of how my meteor has turned out I think it looks really cool.
Subscribe to:
Posts (Atom)


